Daha önce birkaç kez sunucu donanım hatasıyla karşılaştım ve bu beni hep mutlu etmiştir.Bir insan sunucusu bozulduğu için sevinir mi? Hem de öyle bir sevinir ki, servisler düzgün çalışmıyor kapattığınızda başlamıyor ve hatta sunucuyu kapattıktan sonra açılmıyorsa kafayı yemek üzere iseniz 1 saniye! diskleri ve ramleri kontrol ettiniz mi? Donanımda sıkıntınız olabilir mi? Önce disklerinizin kontrolünü sağlayın aşağıdaki yazımda bundan bahsetmiştim.
Bu yazımda ise hala çalışır durumda olan ama hata verme olasılığı yüksek diskimin değişimini sağlayacağım.
Bir yandan işlemleri gerçekleştirirken diğer yandan aynı sunucu üzerinde çalışan bloguma bu yazıyı yazıyor olacağım.
Buradaki tüm komutların SDB diski için örnek olduğunu unutmayınız, SDA diski için komutları değiştirmelisiniz.
# smartctl -a /dev/sdb
202 Percent_Lifetime_Used 0x0030 000 000 001 Old_age Offline FAILING_NOW 100
ile kontrol sağladığımızda smartctl çıktısı bize ssd diskimizin yaşam ömrünü doldurduğunu söylüyor:
Tam smartctl çıktısına buradan ulaşabilirsiniz:
# smartctl -a /dev/sdb
smartctl 6.6 2016-05-31 r4324 [x86_64-linux-4.9.0-6-amd64] (local build)
Copyright (C) 2002-16, Bruce Allen, Christian Franke, www.smartmontools.org

=== START OF INFORMATION SECTION ===
Model Family:     Crucial/Micron MX100/MX200/M5x0/M600 Client SSDs
Device Model:     Crucial_CT250MX200SSD1
Serial Number:    160411A00219
LU WWN Device Id: 5 00a075 111a00219
Firmware Version: MU03
User Capacity:    250,059,350,016 bytes [250 GB]
Sector Sizes:     512 bytes logical, 4096 bytes physical
Rotation Rate:    Solid State Device
Form Factor:      2.5 inches
Device is:        In smartctl database [for details use: -P show]
ATA Version is:   ACS-3 T13/2161-D revision 4
SATA Version is:  SATA 3.2, 6.0 Gb/s (current: 6.0 Gb/s)
Local Time is:    Sun Nov 11 02:01:06 2018 +03
SMART support is: Available - device has SMART capability.
SMART support is: Enabled

=== START OF READ SMART DATA SECTION ===
SMART overall-health self-assessment test result: FAILED!
Drive failure expected in less than 24 hours. SAVE ALL DATA.
No failed Attributes found.

General SMART Values:
Offline data collection status:  (0x80) Offline data collection activity
                                        was never started.
                                        Auto Offline Data Collection: Enabled.
Self-test execution status:      (   0) The previous self-test routine completed
                                        without error or no self-test has ever
                                        been run.
Total time to complete Offline
data collection:                (  795) seconds.
Offline data collection
capabilities:                    (0x7b) SMART execute Offline immediate.
                                        Auto Offline data collection on/off support.
                                        Suspend Offline collection upon new
                                        command.
                                        Offline surface scan supported.
                                        Self-test supported.
                                        Conveyance Self-test supported.
                                        Selective Self-test supported.
SMART capabilities:            (0x0003) Saves SMART data before entering
                                        power-saving mode.
                                        Supports SMART auto save timer.
Error logging capability:        (0x01) Error logging supported.
                                        General Purpose Logging supported.
Short self-test routine
recommended polling time:        (   2) minutes.
Extended self-test routine
recommended polling time:        (   5) minutes.
Conveyance self-test routine
recommended polling time:        (   3) minutes.
SCT capabilities:              (0x0035) SCT Status supported.
                                        SCT Feature Control supported.
                                        SCT Data Table supported.

SMART Attributes Data Structure revision number: 16
Vendor Specific SMART Attributes with Thresholds:
ID# ATTRIBUTE_NAME          FLAG     VALUE WORST THRESH TYPE      UPDATED  WHEN_FAILED RAW_VALUE
  1 Raw_Read_Error_Rate     0x002f   100   100   000    Pre-fail  Always       -       0
  5 Reallocate_NAND_Blk_Cnt 0x0032   100   100   010    Old_age   Always       -       0
  9 Power_On_Hours          0x0032   100   100   000    Old_age   Always       -       22123
 12 Power_Cycle_Count       0x0032   100   100   000    Old_age   Always       -       12
171 Program_Fail_Count      0x0032   100   100   000    Old_age   Always       -       0
172 Erase_Fail_Count        0x0032   100   100   000    Old_age   Always       -       0
173 Ave_Block-Erase_Count   0x0032   001   001   000    Old_age   Always       -       5737
174 Unexpect_Power_Loss_Ct  0x0032   100   100   000    Old_age   Always       -       6
180 Unused_Reserve_NAND_Blk 0x0033   000   000   000    Pre-fail  Always       -       2608
183 SATA_Interfac_Downshift 0x0032   100   100   000    Old_age   Always       -       0
184 Error_Correction_Count  0x0032   100   100   000    Old_age   Always       -       0
187 Reported_Uncorrect      0x0032   100   100   000    Old_age   Always       -       0
194 Temperature_Celsius     0x0022   056   048   000    Old_age   Always       -       44 (Min/Max 25/52)
196 Reallocated_Event_Count 0x0032   100   100   000    Old_age   Always       -       0
197 Current_Pending_Sector  0x0032   100   100   000    Old_age   Always       -       0
198 Offline_Uncorrectable   0x0030   100   100   000    Old_age   Offline      -       0
199 UDMA_CRC_Error_Count    0x0032   100   100   000    Old_age   Always       -       0
202 Percent_Lifetime_Used   0x0030   000   000   001    Old_age   Offline  FAILING_NOW 100
206 Write_Error_Rate        0x000e   100   100   000    Old_age   Always       -       0
210 Success_RAIN_Recov_Cnt  0x0032   100   100   000    Old_age   Always       -       0
246 Total_Host_Sector_Write 0x0032   100   100   000    Old_age   Always       -       149771744792
247 Host_Program_Page_Count 0x0032   100   100   000    Old_age   Always       -       4761421502
248 Bckgnd_Program_Page_Cnt 0x0032   100   100   000    Old_age   Always       -       88971572047

SMART Error Log Version: 1
No Errors Logged

SMART Self-test log structure revision number 1
Num  Test_Description    Status                  Remaining  LifeTime(hours)  LBA_of_first_error
# 1  Extended offline    Completed without error       00%     19334         -
# 2  Extended offline    Completed without error       00%     19322         -
# 3  Vendor (0xff)       Completed without error       00%     19317         -
# 4  Vendor (0xff)       Completed without error       00%     19245         -
# 5  Vendor (0xff)       Completed without error       00%     19173         -
# 6  Vendor (0xff)       Completed without error       00%     19101         -
# 7  Vendor (0xff)       Completed without error       00%     19029         -
# 8  Vendor (0xff)       Completed without error       00%     18957         -
# 9  Short offline       Completed without error       00%     18885         -
#10  Vendor (0xff)       Completed without error       00%        43         -

SMART Selective self-test log data structure revision number 1
 SPAN  MIN_LBA  MAX_LBA  CURRENT_TEST_STATUS
    1        0        0  Not_testing
    2        0        0  Not_testing
    3        0        0  Not_testing
    4        0        0  Not_testing
    5        0        0  Not_testing
Selective self-test flags (0x0):
  After scanning selected spans, do NOT read-scan remainder of disk.
If Selective self-test is pending on power-up, resume after 0 minute delay.
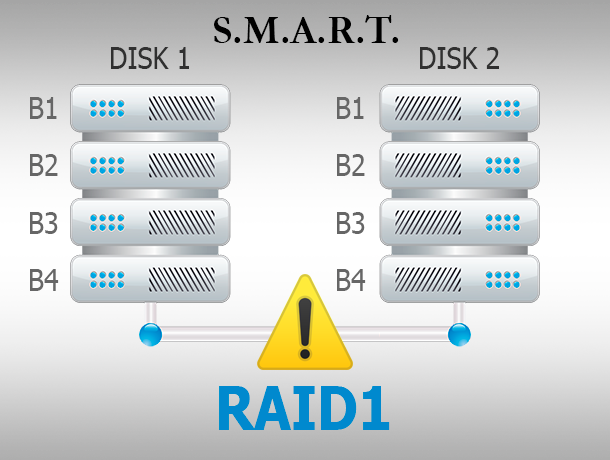
Sunucumuzda Raid 1 konfigürasyonu kullanılıyor bu sebeple önce diskimizin raid durumunu inceleyelim;
# cat /proc/mdstat
Personalities : [raid1] [linear] [multipath] [raid0] [raid6] [raid5] [raid4] [raid10]
md0 : active raid1 sda1[0] sdb1[1]
      33521664 blocks super 1.2 [2/2] [UU]

md2 : active raid1 sdb3[1] sda3[0]
      209986688 blocks super 1.2 [2/2] [UU]
      bitmap: 1/2 pages [4KB], 65536KB chunk

md1 : active raid1 sda2[0] sdb2[1]
      523712 blocks super 1.2 [2/2] [UU]

unused devices: <none>
2 diskimizin de çalışır durumda olduğunu [UU] ile anlayabiliyoruz çalışmıyor olsaydı [U_] olarak gözükecekti.
Fakat diskimiz yaşam ömrünü doldurduğu FAILING_NOW ile uyarı verdiği için diskimizi değiştirmek istiyoruz.
Değişimi sunucumuz açık iken hot swap yöntemi ile değiştireceğiz.
Diskimizi değiştirmek için hard diskin her bir bölümünü raid array den çıkarmamız gerekiyor.
Bunun için aşağıdaki komutunu kullanıyoruz.;
# mdadm /dev/md0 -r /dev/sdb1
mdadm: hot remove failed for /dev/sdb1: Device or resource busy
cevabını aldık çünkü diskimiz çalışır durumda ve insan hatasını önlemek için diskin kullanıldığını belirtiyor.
Biz yine de değiştirmek istiyoruz bunun için disk bölümünü fail olarak işaretliyoruz;
# mdadm --manage /dev/md0 --fail /dev/sdb1
mdadm: set /dev/sdb1 faulty in /dev/md0
mdstat çıktısını kontrol ediyoruz ve sdb (F) olarak gözüküyor;
md0 : active raid1 sda1[0] sdb1[1](F)
      33521664 blocks super 1.2 [2/1] [U_]
Şimdi tekrar diski çıkartıyoruz;
# mdadm /dev/md0 -r /dev/sdb1
hmdadm: hot removed /dev/sdb1 from /dev/md0
Şimdi başarıyla diski çıkarttık tekrar mdstat kontrolü yapıyoruz;
md0 : active raid1 sda1[0]
      33521664 blocks super 1.2 [2/1] [U_]
sdb1[1](F) yazısının kaybolduğunu yani diskin çıkarıldığını görüyoruz.
Şimdi bu işlemi diğer bölümler için de aynı şekilde uyguluyoruz.
mdadm –manage /dev/md1 –fail /dev/sdb2
mdadm –manage /dev/md2 –fail /dev/sdb3
son durumda mdstat çıktısı:
md0 : active raid1 sda1[0]
      33521664 blocks super 1.2 [2/1] [U_]

md2 : active raid1 sda3[0]
      209986688 blocks super 1.2 [2/1] [U_]
      bitmap: 1/2 pages [4KB], 65536KB chunk

md1 : active raid1 sda2[0]
      523712 blocks super 1.2 [2/1] [U_]
Disk çıkarma işlemini başarıyla tamamladık.
Şimdi her ihtimale karşı disk tablosunun yedeğini alacağız.
# gdisk -l /dev/sda
GPT fdisk (gdisk) version 1.0.1

Partition table scan:
  MBR: MBR only
  BSD: not present
  APM: not present
  GPT: not present


***************************************************************
Found invalid GPT and valid MBR; converting MBR to GPT format
in memory.
***************************************************************

Disk /dev/sda: 500118192 sectors, 238.5 GiB
Logical sector size: 512 bytes
Disk identifier (GUID): 1FD293FA-6B3B-47B5-934C-B1FE00CFD73A
Partition table holds up to 128 entries
First usable sector is 34, last usable sector is 500118158
Partitions will be aligned on 2048-sector boundaries
Total free space is 11725053 sectors (5.6 GiB)

Number  Start (sector)    End (sector)  Size       Code  Name
   1            2048        67110911   32.0 GiB    FD00  Linux RAID
   2        67110912        68159487   512.0 MiB   FD00  Linux RAID
   3        68159488       488395119   200.4 GiB   FD00  Linux RAID
Found invalid GPT and valid MBR; converting MBR to GPT format in memory.Uyarısıyla diskimizin MBR olduğunu öğreniyoruz. MBR backup aldık.
sfdisk --dump /dev/sda > sda_parttable_mbr.bak
Şimdi disk değişimi ve sunucu sağlayıcımıza disk değişimi için talepte bulunduk.Disk değişti bilgisi geldikten sonra smart bilgisine bakıyoruz;
# smartctl -a /dev/sdb
smartctl 6.6 2016-05-31 r4324 [x86_64-linux-4.9.0-6-amd64] (local build)
Copyright (C) 2002-16, Bruce Allen, Christian Franke, www.smartmontools.org

=== START OF INFORMATION SECTION ===
Device Model:     Micron_1100_MTFDDAK256TBN
Serial Number:    170515AC9C1E
LU WWN Device Id: 5 00a075 115ac9c1e
Firmware Version: M0MU020
User Capacity:    256,060,514,304 bytes [256 GB]
Sector Size:      512 bytes logical/physical
Rotation Rate:    Solid State Device
Form Factor:      2.5 inches
Device is:        Not in smartctl database [for details use: -P showall]
ATA Version is:   ACS-3 T13/2161-D revision 5
SATA Version is:  SATA 3.2, 6.0 Gb/s (current: 6.0 Gb/s)
Local Time is:    Sun Nov 11 04:37:40 2018 +03
SMART support is: Available - device has SMART capability.
SMART support is: Enabled

=== START OF READ SMART DATA SECTION ===
SMART overall-health self-assessment test result: PASSED

General SMART Values:
Offline data collection status:  (0x00) Offline data collection activity
                                        was never started.
                                        Auto Offline Data Collection: Disabled.
Self-test execution status:      (   0) The previous self-test routine completed
                                        without error or no self-test has ever
                                        been run.
Total time to complete Offline
data collection:                (  678) seconds.
Offline data collection
capabilities:                    (0x7b) SMART execute Offline immediate.
                                        Auto Offline data collection on/off support.
                                        Suspend Offline collection upon new
                                        command.
                                        Offline surface scan supported.
                                        Self-test supported.
                                        Conveyance Self-test supported.
                                        Selective Self-test supported.
SMART capabilities:            (0x0003) Saves SMART data before entering
                                        power-saving mode.
                                        Supports SMART auto save timer.
Error logging capability:        (0x01) Error logging supported.
                                        General Purpose Logging supported.
Short self-test routine
recommended polling time:        (   2) minutes.
Extended self-test routine
recommended polling time:        (   4) minutes.
Conveyance self-test routine
recommended polling time:        (   3) minutes.
SCT capabilities:              (0x0035) SCT Status supported.
                                        SCT Feature Control supported.
                                        SCT Data Table supported.

SMART Attributes Data Structure revision number: 16
Vendor Specific SMART Attributes with Thresholds:
ID# ATTRIBUTE_NAME          FLAG     VALUE WORST THRESH TYPE      UPDATED  WHEN_FAILED RAW_VALUE
  1 Raw_Read_Error_Rate     0x002f   100   100   000    Pre-fail  Always       -       0
  5 Reallocated_Sector_Ct   0x0032   100   100   010    Old_age   Always       -       0
  9 Power_On_Hours          0x0032   100   100   000    Old_age   Always       -       0
 12 Power_Cycle_Count       0x0032   100   100   000    Old_age   Always       -       1
171 Unknown_Attribute       0x0032   100   100   000    Old_age   Always       -       0
172 Unknown_Attribute       0x0032   100   100   000    Old_age   Always       -       0
173 Unknown_Attribute       0x0032   100   100   000    Old_age   Always       -       1
174 Unknown_Attribute       0x0032   100   100   000    Old_age   Always       -       0
183 Runtime_Bad_Block       0x0032   100   100   000    Old_age   Always       -       0
184 End-to-End_Error        0x0032   100   100   000    Old_age   Always       -       0
187 Reported_Uncorrect      0x0032   100   100   000    Old_age   Always       -       0
194 Temperature_Celsius     0x0022   068   066   000    Old_age   Always       -       32 (Min/Max 28/34)
196 Reallocated_Event_Count 0x0032   100   100   000    Old_age   Always       -       0
197 Current_Pending_Sector  0x0032   100   100   000    Old_age   Always       -       0
198 Offline_Uncorrectable   0x0030   100   100   000    Old_age   Offline      -       0
199 UDMA_CRC_Error_Count    0x0032   100   100   000    Old_age   Always       -       0
202 Unknown_SSD_Attribute   0x0030   100   100   001    Old_age   Offline      -       0
206 Unknown_SSD_Attribute   0x000e   100   100   000    Old_age   Always       -       0
246 Unknown_Attribute       0x0032   100   100   000    Old_age   Always       -       0
247 Unknown_Attribute       0x0032   100   100   000    Old_age   Always       -       0
248 Unknown_Attribute       0x0032   100   100   000    Old_age   Always       -       104
180 Unused_Rsvd_Blk_Cnt_Tot 0x0033   000   000   000    Pre-fail  Always       -       2055
210 Unknown_Attribute       0x0032   100   100   000    Old_age   Always       -       0

SMART Error Log Version: 1
No Errors Logged

SMART Self-test log structure revision number 1
No self-tests have been logged.  [To run self-tests, use: smartctl -t]

SMART Selective self-test log data structure revision number 1
 SPAN  MIN_LBA  MAX_LBA  CURRENT_TEST_STATUS
    1        0        0  Not_testing
    2        0        0  Not_testing
    3        0        0  Not_testing
    4        0        0  Not_testing
    5        0        0  Not_testing
Selective self-test flags (0x0):
  After scanning selected spans, do NOT read-scan remainder of disk.
If Selective self-test is pending on power-up, resume after 0 minute delay.
Yeni ssd miz hazır şimdi ssd yi raid e bağlamamız gerekiyor
Önce MBR tablosunu kopyalıyoruz
# sfdisk -d /dev/sda | sfdisk /dev/sdb
Bölümlerimizi raid e ekliyoruz
# mdadm /dev/md0 -a /dev/sdb1
# mdadm /dev/md1 -a /dev/sdb2
# mdadm /dev/md2 -a /dev/sdb3
Sonra SYNC için bekliyoruz tüm bölümler [UU] olduğunda sync tamamlanıcak.
# cat /proc/mdstat
Personalities : [raid1] [linear] [multipath] [raid0] [raid6] [raid5] [raid4] [raid10]
md0 : active raid1 sdb1[2] sda1[0]
      33521664 blocks super 1.2 [2/1] [U_]
      [====>................]  recovery = 21.9% (7345536/33521664) finish=2.1min speed=201309K/sec

md2 : active raid1 sdb3[2] sda3[0]
      209986688 blocks super 1.2 [2/1] [U_]
        resync=DELAYED
      bitmap: 2/2 pages [8KB], 65536KB chunk

md1 : active raid1 sdb2[2] sda2[0]
      523712 blocks super 1.2 [2/1] [U_]
        resync=DELAYED

unused devices: <none>
Eşitleme işlemi tamamlandı.
# cat /proc/mdstat
Personalities : [raid1] [linear] [multipath] [raid0] [raid6] [raid5] [raid4] [raid10]
md0 : active raid1 sdb1[2] sda1[0]
      33521664 blocks super 1.2 [2/2] [UU]

md2 : active raid1 sdb3[2] sda3[0]
      209986688 blocks super 1.2 [2/2] [UU]
      bitmap: 2/2 pages [8KB], 65536KB chunk

md1 : active raid1 sdb2[2] sda2[0]
      523712 blocks super 1.2 [2/2] [UU]

unused devices: <none>
Bitmap değerinin değiştiğini görebiliriz bu disklerin eşitlenmesiyle ilgili bir parametre ve bizim için çok önemli değil.
Son olarak yeni diskimize grub2 kurulumunu yapıyoruz yeni sistemler grub2 kullanırlar ve sadece tek bir komutla kurulumu tamamlayacağız;
# grub-install /dev/sdb
Installing for i386-pc platform.
Installation finished. No error reported.
Disk değiştirme işlemini başarıyla tamamlıyoruz.
Eğer grub2 kurulumunu unutursak;
Başıma geldiği için yazıyorum, sunucu işletim sistemini boot edemeyecektir.
Düzeltmek için buradaki adımları uygulayabilirsiniz aşağıya komutların kısa bir özetini yazıyorum;
Now, in my case, I assumed that Grub2 was broken. So I activated the Hetzner Rescue System, booted into it, and reinstalled Grub2. I have found the following method here and it worked for me. First you have to mount the regular RAID filesystem under /mnt :

mount /dev/md2 /mnt
mount /dev/md1 /mnt/boot
mount -t dev -o bind /dev /mnt/dev
mount -t proc -o bind /proc /mnt/proc
mount -t sys -o bind /sys /mnt/sys
chroot /mnt

At this point, you are in your regular root directory. To reinstall Grub2 the Debian Way, I did:

apt-get install --reinstall grub-pc

To make really sure, I reconfigured the package:

[*] /dev/sda
[*] /dev/sdb

No errors were reported. I rebooted again and it did not come online immediately, for the reasons previously mentioned. I waited long enough (in my case, 15 minutes) and it did come online. So, rule number one is: Don’t panic!